Earth drill whispering – tips for keeping mechanical augers rental-ready
By Mike Hale Sales Manager Little Beaver
Features Tech tipsAuto mechanics deal with it all the time — the phone call requesting an over-the-phone diagnosis. Inevitably the conversation includes the vehicle owner providing a not-so-spot-on impression of the sound their car or truck is making, whether a screeching, whining, clunking or grinding noise.
 What’s in the ground should determine what’s in your drill. One gear ratio does not serve all needs. Auto mechanics deal with it all the time — the phone call requesting an over-the-phone diagnosis.
Although this is a less than ideal way to pinpoint a mechanical problem, with years of experience comes the ability to make an insightful and often accurate assessment of what to expect when the vehicle rolls into the shop.
Mechanical earth drill experts develop a similar knack for over-the-phone troubleshooting. From the auger turning too slowly or turning when it shouldn’t, to a smoking clutch or overheating gearbox, many of the common concerns that experts hear allow for spot-on answers. And fortunately, drill operators often know more about their drills than an average driver knows about what’s happening under the hood of their car, which means less reliance on poorly imitated sounds.
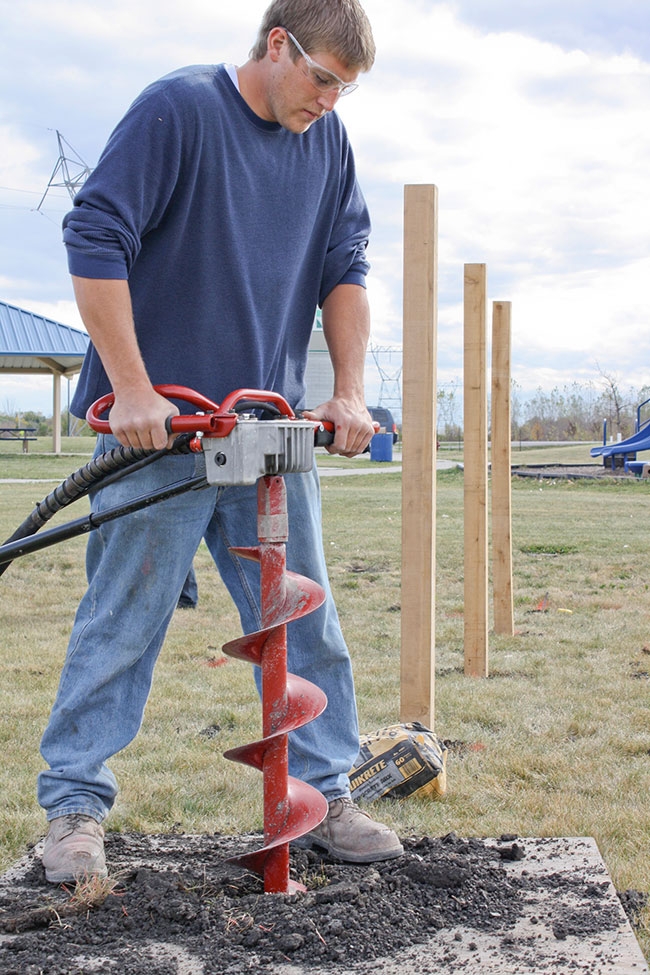
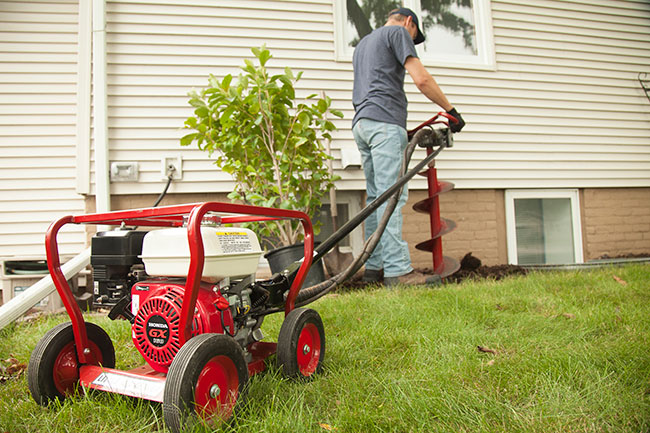
Mechanical drills are compact, powerful and excellent for quickly drilling holes, making them a popular choice for contractors and rental centers. The catch? Mechanical drills are transmission-powered and have significantly more moving parts than their more expensive hydraulic counterparts. Knowing how to prevent, recognize and repair the most common problems will go a long way toward keeping a mechanical drill running efficiently.
Prevention
What steps can I take to minimize the risk of damaging the drill?
Preventing damage starts with selecting a unit with the correct gear ratio and auger for the soil in which it will be drilling. When working in regular black soil with minimal rocks and roots, a 10:1 gear ratio with a
standard auger will provide fast and efficient results. For drilling in clay or other difficult conditions, a 10:1 gear ratio will still work, however it’s best to switch from a standard to carbide blade, which should also be used when digging in areas with tree roots.
When working in soil with rocks that exceed three inches in diameter, a drill with a 20:1 gear ratio reduction should be used with a heavy-duty auger. The 20:1 gear reduction slows the auger from 360 to 180 RPM. This setup pops the rocks out of the soil and continues to spin. Drilling in these conditions with a 10:1 ratio and standard auger can severely damage the auger, blades, flex shaft and gearbox. Whether buying or renting, it’s important to understand your application and soil conditions to select the ideal drill.
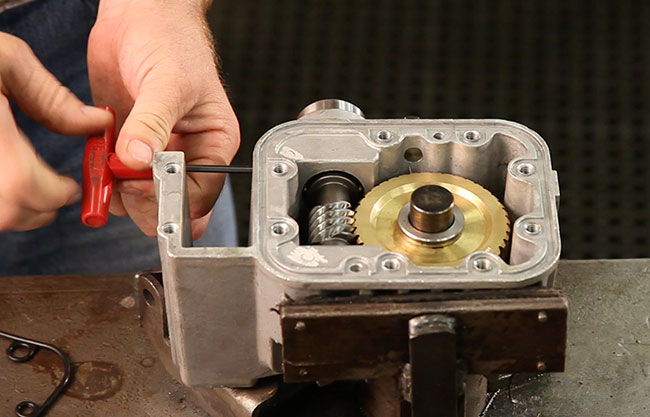
Gearbox Problems
Should I be concerned that the gearbox is hot and making an unusual sound?
First of all, it’s important to understand that the gearbox will always be hot to the touch when the drill is operating. However, if the transmission is extremely hot, smells like burned oil or starts making unusual sounds, it’s likely the result of low oil. Oil levels can drop as a result of leaks around the seal, lower output shaft or the top of the transmission. If this happens, stop the drill and check the gearbox’s oil level.
Excessive heat and gearbox sounds may also be a sign of worn bearings. Although it’s normal for bearings to wear over time, the process happens much more quickly when oil levels are not properly maintained. To prevent early wear, check the transmission oil monthly or after every 40 hours of operation. Skipping maintenance and ignoring warning signs can cause the gearbox to lock up, taking the drill out of use until the bearings can be replaced. Replacing the bearings takes as long as three hours and can cost upward of $100 to $200, not to mention the cost of equipment downtime if parts are not readily available.
Flexible Drive Shaft Damage
The engine is running, so why won’t the auger turn?
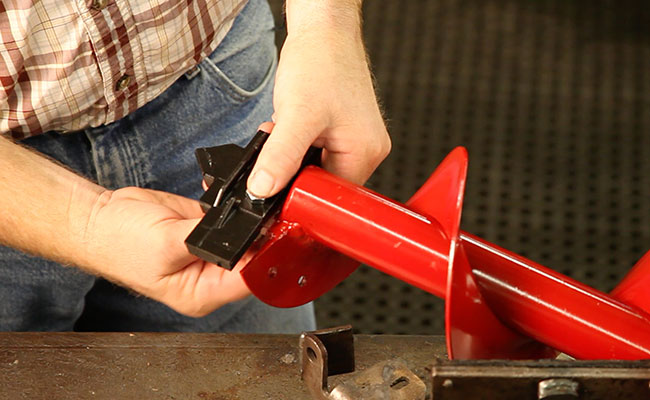
A problem with the drivetrain, typically along the flexible drive shaft, tends to be the culprit when an auger won’t turn. To pinpoint the problem, start by inspecting the end fittings for cracks or breaks. If there are broken wires or sharp kinks, it’s time to replace the shaft housing. If things appear fine from the outside, remove the flex shaft for further inspection. Depending on the damage, the entire flex shaft assembly may need to be replaced.
To prevent flex shaft damage, it’s important to clean, examine and grease the flex shaft every 50 hours of operation. Check the owner’s manual to determine the correct amount of grease, as excessive grease can gum up in the flex shaft, reducing its operating life. Too little grease, on the other hand, can dry out the cable, causing it to break or generate enough heat and friction to burn through the outer housing. Ignoring flex shaft maintenance can also damage the pinion gear bearings, which cost about $150 to replace.
Helixing of the flex shaft is another concern, especially if the auger repeatedly hits solid objects, such as rocks, during operation. When an obstruction causes the auger to stop abruptly while the engine delivers torque, the shaft can helix, which will lead to diminished performance and eventually cause the flex shaft to lock up. Units with torque tubes, however, prevent helixing by transferring torque to the engine housing, reducing strain on both operator and the flex shaft. This also improves user safety and allows for one-person drill operation. Additionally, units with a centrifugal clutch protect the flex shaft by slipping when the auger strikes an object.
What’s in the ground should determine what’s in your drill. One gear ratio does not serve all needs.
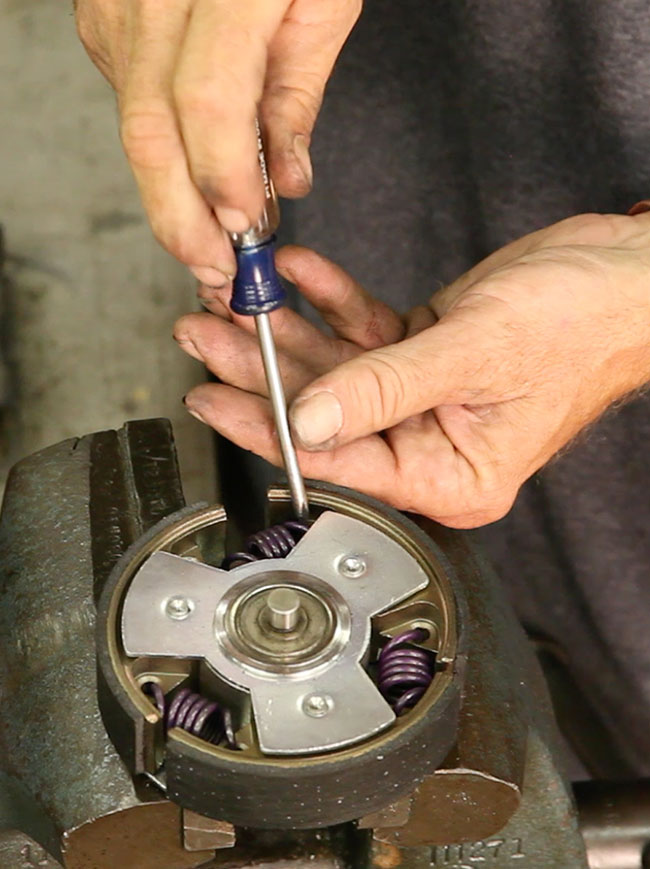

Smoking Clutch
Why does the clutch slip or cause the drill to jerk during operation?
Over time, a drill’s clutch padding wears, resulting in reduced performance when engaging the auger or when accelerating the engine from idle to full speed. The clutch will continue to run, even if the padding is completely gone, leading to easily detectable problems. It’s best to inspect the clutch every 30 days or any time the flexible drive shaft is being lubricated. Also, regularly clean the clutch shoes and drums, replacing them if any of the padding is missing. Monitor the clutch bearing as well, ensuring it remains loose and turns easily. If the clutch drum does not turn freely, it can lock up, causing the clutch to slip.
Spring damage — another common clutch-related concern — can cause the clutch to overheat and may result in the auger spinning when the engine is idling. If this is the case, the springs need to be replaced.
Never a Dull Moment
Why is the drill less efficient than it used to be despite everything working properly?
This is one of the most common questions that operators ask and, luckily, it’s an easy one to diagnose. Too often, operators allow the points and blades to wear beyond the point of being effective. The drill can run perfectly and spin all day, but if the blades and points are worn, the unit will become less and less effective. It’s important to monitor the blade sharpness and replace them when they become dull. If the auger needs new blades or points, discontinue use until they have been replaced. Always having replacement parts on hand will make this a quick and easy fix and will keep downtime to a minimum.
Engine Problems
Why won’t my engine start?
When the engine won’t start, it’s best to double-check the basics. Occasionally, it is as simple as forgetting to flip the toggle kill switch or engine stop switch out of the “off” position. If both switches are in the proper position, check that the torque tube — if your drill is equipped with one — is connected at the engine end. As a safety feature, drills with torque tubes are designed with an engine safety kill switch to prevent the engine from starting when the torque tube is not attached.
If everything appears to be set up correctly and the engine still won’t start, the engine itself may be the issue. To ensure the engine is serviced properly, contact the equipment dealer or a qualified technician.
Online Resources
Are there convenient resources for diagnosing and fixing these problems without calling?
Digital resources are available at everyone’s fingertips, including comprehensive maintenance brochures and video tutorials. These helpful tools are an excellent resource for operators and often include visuals as well as step-by-step instructions. A manufacturer’s website and, in some cases, its YouTube channel, are often the best places to find these resources.
Knowing the drill, keeping up with maintenance and having quick access to useful online resources will go a long way toward successful drilling. When that’s not enough, help is still just a phone call away.
About the Author
Mike Hale started his career in the fencing industry in 1974, and, in 1996, began working at Little Beaver. He offers expertise on fencing and hole digging equipment as the sales manager. If you have questions or comments, contact Mike at mikeh@littlebeaver.com or call 800-227-7515.
Print this page
Leave a Reply